
Create custom roles with the permission matrix.
Build custom roles on the Roles & permissions page: add a role, tick the exact permissions per resource, save per column, and assign it to your team.
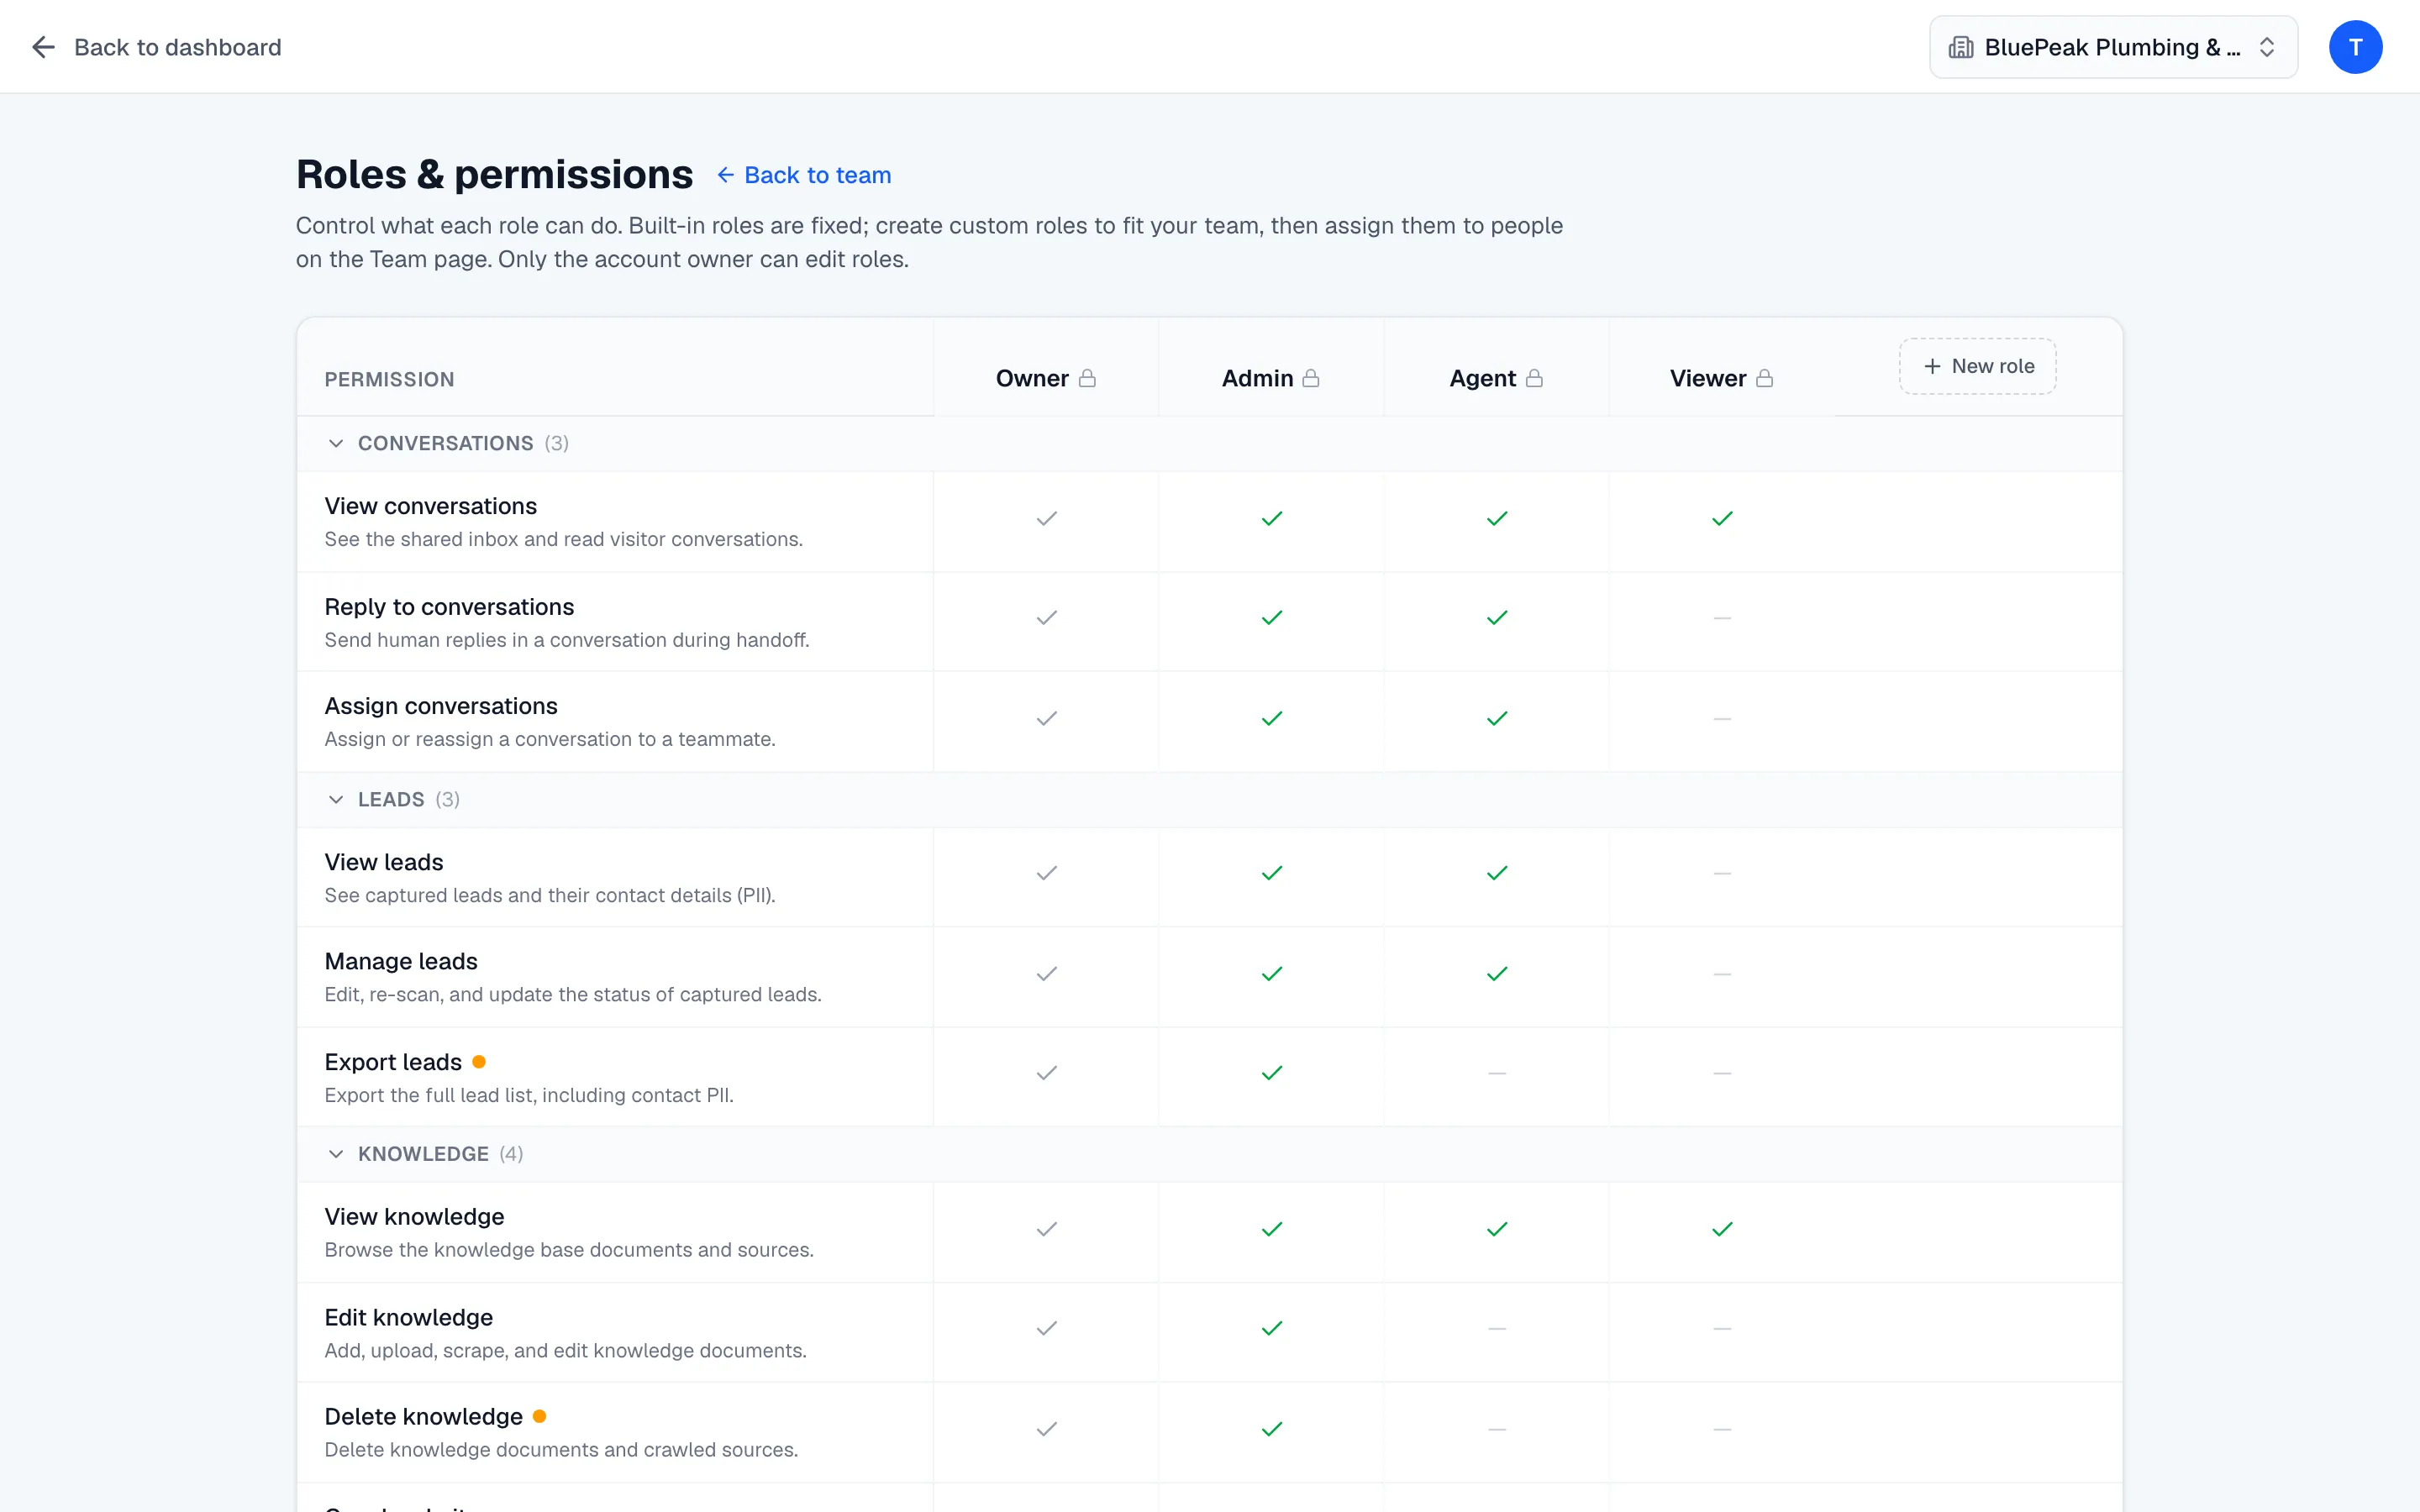
Custom roles let you grant exactly the access a person needs — for example a Content editor who manages the knowledge base but not the team, or an Analyst who only views analytics. You build them on the Roles & permissions page, reached from Manage roles on the Team page.
Only the account owner can create or edit roles. Everyone else sees the matrix read-only.
The permission matrix
The page is a matrix. Down the side are permissions grouped by resource — Conversations, Leads, Knowledge, Business profile, Analytics, Settings, Saved replies, Team, Billing, and Organization. Across the top are role columns: the four built-in roles (Owner, Admin, Agent, Viewer), then your custom roles, then a New role column.
Built-in columns are locked — a lock icon marks them. The Owner column is always fully granted. Rows for the three owner-only permissions show a lock in every non-owner column, because they can never be delegated.
Add a custom role
- Click New role at the top of the matrix (or Create a role if you have none yet).
- Give the role a Name and, optionally, a Description.
- Under Start from, choose a starting point: Blank, or copy the permissions of an existing role. You’ll fine-tune from there. (Copying Owner does not carry over the owner-only powers.)
- Click Create role. The new column appears in the matrix, ready to edit.
Tick permissions and save
With the role’s column showing, check or uncheck each permission you want. Use the collapsible group headers to focus on one resource at a time. Each permission row shows a short description of what it grants and a risk marker on higher-impact ones.
Your edits are a draft until you save. Below the matrix, each custom role has a Save chip that lights up when it has unsaved changes — click Save to commit that column, or Reset to discard. An amber dot on the column header also flags unsaved changes.
Rename or delete a role
On a custom column header, use the pencil to rename the role or edit its description, and the trash to delete it. A role can’t be deleted while it’s in use — Zurvo tells you how many people still hold it, so reassign them to a different role on the Team page first.
Assign the role
Once saved, the custom role appears in the role dropdowns on the Team page. Assign it when you invite someone or from Manage access on an existing member.
For the full list of permission keys and how they map to each built-in role, see the permissions reference.